
A few weeks ago, I posted about taking some photos in RAW. Since then, I have experimented more, and my resolution stands - I love shooting in RAW! It just seems like I can make the images pop much easier than I could shooting in jpeg form.
So to explain to those who may not know about RAW, shooting in RAW format rather than jpeg means that all of the data the camera's sensor captures is transferred to your computer rather than just the data for the settings at the time of the shot. This means that once the image is on your computer, you can change the white balance, exposure, and some other things AFTER you take the picture. So no more worrying if your exposure or white balance are spot on... it can be adjusted after you have taken the picture!! Amazing, if you ask me!
Not all camera's have the capability to shoot in RAW, but if you have a DSLR, chances are, it does. I found my settings in my Canon Digital Rebel XTi by going to menu - quality - RAW. You can also shoot in RAW+jpeg, which means it will record both. This is useful if you will need the images quickly and don't have time to convert the RAW image to jpeg format but still want the capability to edit them in detail later.
Not only will you need a camera that can shoot in RAW, but you will also need software that can read it. I use Photoshop Elements, which is a fairly reasonably priced but very powerful tool. Someday I hope to upgrade to the full blown Photoshop, but not yet.
When you download your pictures from your camera to the computer, you can do this in the same method that you normally would, but windows will not be able to show you a "preview" icon of your image, because it will not recognize the file type. For me, it's a .CR2, but this may be different depending on your camera.
Once I've downloaded my images, I head to Photoshop Elements Organizer. It automatically notices that I've downloaded new pictures and retrieves them for me. Now I can see what the pictures look like! I go through and pick out my favorites and tag them.
Once I find a good picture, I click "Fix" - "Full Photo Edit" to open the image in Photoshop Elements Editor. A special window opens which allows me to edit the settings of my picture.
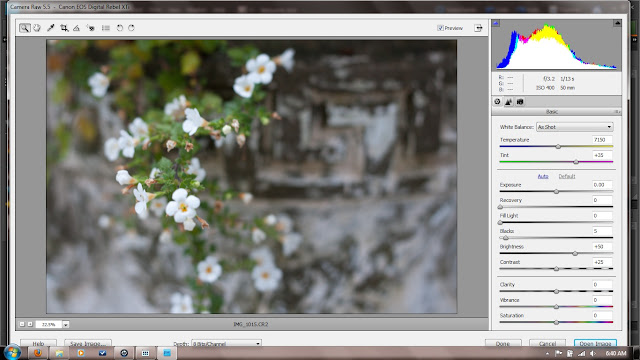
Now I can use the sliders on the right to adjust the white balance, darks, lights, etc. Here is another screenshot after I've made the adjustments I wanted. This takes a bit of playing around with to get used to, but don't be afraid to adjust whatever you want - you won't lose the data or "mess" it up. You can easily go back and change this later. That's the beauty of RAW - all of the data is there, it's just a matter of telling it which data to show!
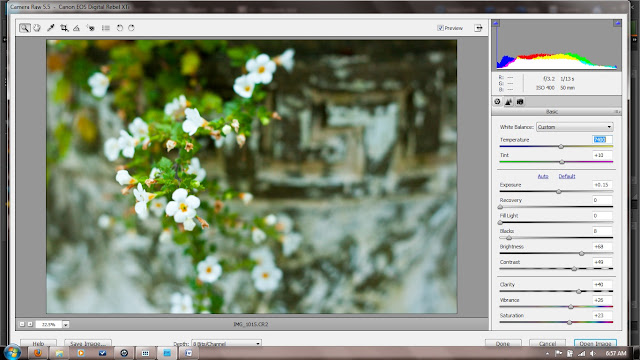
One of my favorite sliders is the "vibrance" slider. It really makes your colors pop without making them seem incorrect or over-saturated. I realize I'm not giving a lot of detail here on what each slider does, but that's truly because I don't understand all of it myself. I'd encourage you to simply play around with it and see what each slider does to the image. Another thing to note is that there is a second tab of sliders (see the tab with the triangles?) that controls sharpening and noise reduction.
Now to open my image in the normal Photoshop Elements Editor workspace, I simply click "Open Image" in the lower right corner. Now your image is in the Editor like normal, and the changes you made to the RAW file are automatically saved. But remember, if you open the RAW file again, you will see the sliders in the same position they are now - meaning you didn't lose any data, it's all still there for you to play with!
Now that I have the image in Editor, I like to play around with it some more, crop it, do some Pioneer Woman Actions on it.
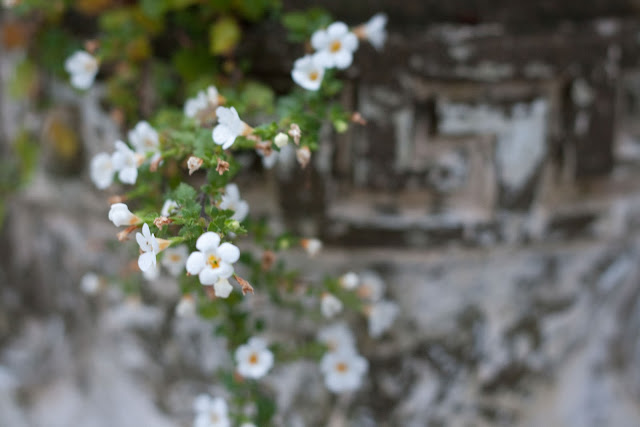
So here's the straight-out-of-the-camera image:
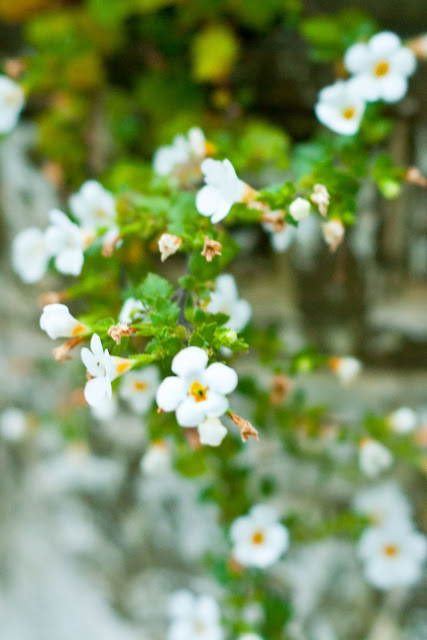
And here's the final result:
Which do you like better? Have I convinced you to give it a try yet?
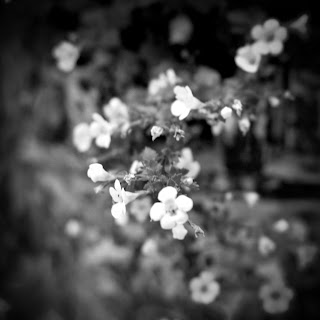
Later this week I will show you how to take a RAW file and convert it to black and white, here is a sneak peak:
If you'd like to read more, here is an excellent discussion on RAW vs. JPEG.

So to explain to those who may not know about RAW, shooting in RAW format rather than jpeg means that all of the data the camera's sensor captures is transferred to your computer rather than just the data for the settings at the time of the shot. This means that once the image is on your computer, you can change the white balance, exposure, and some other things AFTER you take the picture. So no more worrying if your exposure or white balance are spot on... it can be adjusted after you have taken the picture!! Amazing, if you ask me!
Not all camera's have the capability to shoot in RAW, but if you have a DSLR, chances are, it does. I found my settings in my Canon Digital Rebel XTi by going to menu - quality - RAW. You can also shoot in RAW+jpeg, which means it will record both. This is useful if you will need the images quickly and don't have time to convert the RAW image to jpeg format but still want the capability to edit them in detail later.
Not only will you need a camera that can shoot in RAW, but you will also need software that can read it. I use Photoshop Elements, which is a fairly reasonably priced but very powerful tool. Someday I hope to upgrade to the full blown Photoshop, but not yet.
When you download your pictures from your camera to the computer, you can do this in the same method that you normally would, but windows will not be able to show you a "preview" icon of your image, because it will not recognize the file type. For me, it's a .CR2, but this may be different depending on your camera.
Once I've downloaded my images, I head to Photoshop Elements Organizer. It automatically notices that I've downloaded new pictures and retrieves them for me. Now I can see what the pictures look like! I go through and pick out my favorites and tag them.
Once I find a good picture, I click "Fix" - "Full Photo Edit" to open the image in Photoshop Elements Editor. A special window opens which allows me to edit the settings of my picture.

Now I can use the sliders on the right to adjust the white balance, darks, lights, etc. Here is another screenshot after I've made the adjustments I wanted. This takes a bit of playing around with to get used to, but don't be afraid to adjust whatever you want - you won't lose the data or "mess" it up. You can easily go back and change this later. That's the beauty of RAW - all of the data is there, it's just a matter of telling it which data to show!

One of my favorite sliders is the "vibrance" slider. It really makes your colors pop without making them seem incorrect or over-saturated. I realize I'm not giving a lot of detail here on what each slider does, but that's truly because I don't understand all of it myself. I'd encourage you to simply play around with it and see what each slider does to the image. Another thing to note is that there is a second tab of sliders (see the tab with the triangles?) that controls sharpening and noise reduction.
Now to open my image in the normal Photoshop Elements Editor workspace, I simply click "Open Image" in the lower right corner. Now your image is in the Editor like normal, and the changes you made to the RAW file are automatically saved. But remember, if you open the RAW file again, you will see the sliders in the same position they are now - meaning you didn't lose any data, it's all still there for you to play with!
Now that I have the image in Editor, I like to play around with it some more, crop it, do some Pioneer Woman Actions on it.
So here's the straight-out-of-the-camera image:

And here's the final result:

Which do you like better? Have I convinced you to give it a try yet?
Later this week I will show you how to take a RAW file and convert it to black and white, here is a sneak peak:

If you'd like to read more, here is an excellent discussion on RAW vs. JPEG.
5 comments:
I used to shoot in raw+jpg but kept filling my memory card so sometimes I change it to jpg.
I have a huge memory card I just takes hundreds of pictures at special events.
That is a downside, I'm sort of on the lookout for a new card. I can only take about 90 pics in RAW before I fill my card!
Well Erin now all I need is a DSLR!
It's going on my Christmas, anniversary, birthday list :)
I don't know if I can shoot in RAW...but now I'm convinced I need photoshop elements! I have full-blown photoshop (paid for by work!) and barely understand it...this looks much more user-friendly!
This is very interesting and the pictures are amazing.
Post a Comment